Using the smartfigure gallery
In this post I will go step by step through the creation and sharing of SmartFigures on https://sdash.sourcedata.io, we take for granted that you have an account and you are part of the SFB1315 members group.
Browse content
Search and filter content
Your dashboard will show all figures you have access to, the newest one on top. This includes:
- SmartFigures you created
- SmartFigures you were added to as an author
- SmartFigures shared with a group you are a member of
- SmartFigures shared openly
Note that before you login, you only see the open figures.
This can be a lot, so you can search for one specific term using the search box, filter by author or keywords using the left navigation bar, or look specifically at one group by going to the group page (click the Go button under the group of your choice in the left navigation bar). Note that you can hide or show the left navigation bar, and that you can combine the different filters.
 Filter by group (being on the group page), authors and keywords (left navigation), and search via one term (upper banner).
Smartfigures details
When clicking on a SmartFigure preview, you will access more information. On the left side, you can click again on the image to zoom in the figure, read the title and description. On the right, you will find different tabs where you can access:
- Sources: URL or document linked to this figure. For instance, preprint or paper where the image was published, or data and code used to create the figure.
- Keywords: if you click on a keyword, it will send you to a page resulting from search for this keyword, allowing you to access related figures.
- Share: show you a URL to access the figure directly.
- Discussion: you can comment and answer comments on the SmartFigure.
The last two tabs are only visible when you have logged in, and the share tab looks different if you have write access to the figure.
Create or modify SmartFigure
Upload an image
Either drag and drop an image in your browser, or click the Browse button to choose a file. It will then upload the image (be patient at this point, it may not give a message right away). You can then change the information related to this image to create a SmartFigure, as described below.
Modify images
You can modify figures which have a red border: either you have uploaded them, or their creator added you as a corresponding author. When clicking on them, you will be able to modify their content.
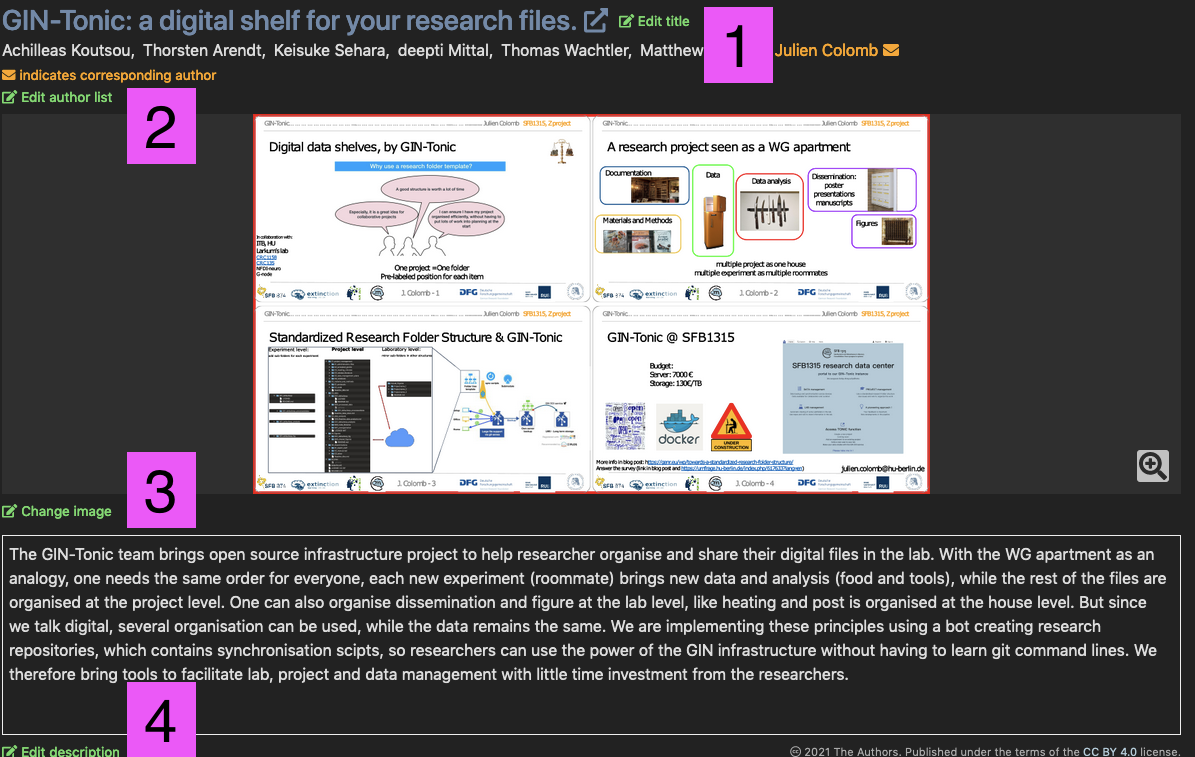
- The figure itself 3: you can upload a new figure if you are not happy with this one. Note that the figure can also be downladed using the
Downloadbutton on the right panel. - The figure title 1: This will be highly visible on the SFBwebsite once made open.
- The figure caption 4: Here you can change or add information that will explain the figure in details. For Figures representing a paper, the abstract was used.
- The list of authors 2 (See the following figure)
- The first box allows you to search for people present on the platform. If you set them as authors (
Au.), the will be listed as authors, get access to the figure but will not be allowed to change it. Corresponding authors (Corr.) and curator (Cur.) will have the same rights as you have on the figure, but curators will not be listed in the author list. - The second series of boxes allows you to enter authors which are not on the platform.
- The first box allows you to search for people present on the platform. If you set them as authors (
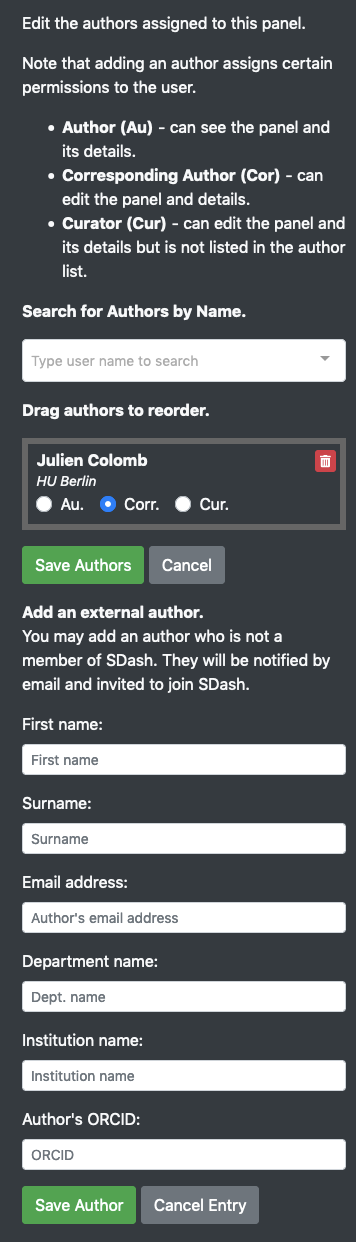
Do not forget to push the Save Authors button when done (and sporadically during the author list edition).
Making the figure smart
1. Sources
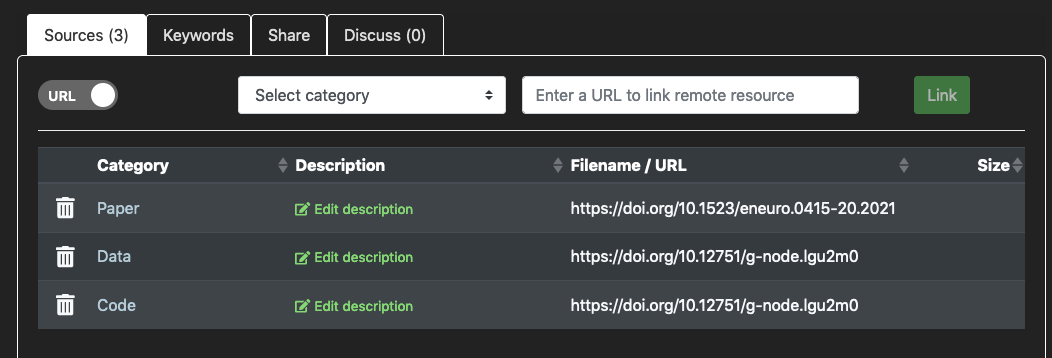
This tabs allows you to link your SmartFigures with URL or with uploaded documents. Please use the correct category and add some comments to each link, it will be much easier for readers to find what they are looking for.
If you saved or published the data and the code of a figure together, it is nice to add the URL twice so that the reader knows that both the code and the data is available.
2. Keywords
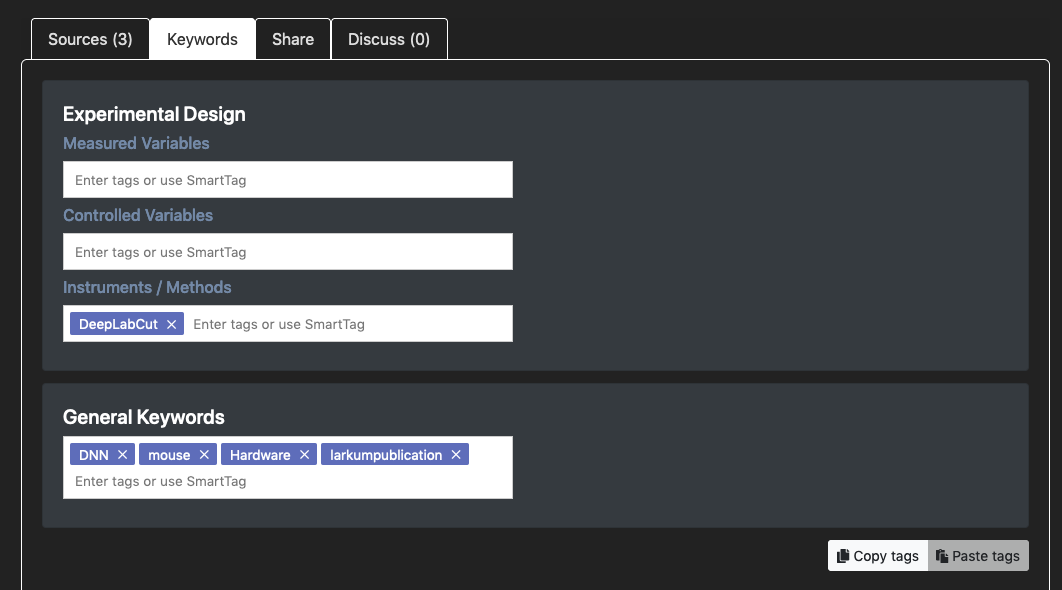
Keywords (or tags) are used to facilitate the search and discovery of Figures. When you save your caption, an AI will propose you some tags, that you can accept or reject. Please add your own tag in the general box, a data curator should deal with the other type of tags.
For instance, you may type: project:xxx where xxx is the name of your project (for example, project:A01), as this will allow you to filter for Figures from your project, by clicking on the keyword (in that tab).
Sharing the figure
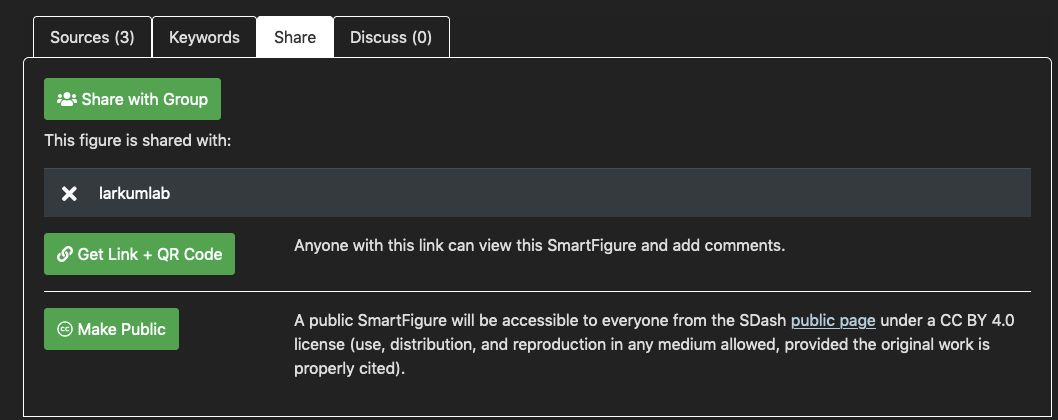
You can use the Share tag to choose who can see your SmartFigure. Even if you plan on making the Figure public, you should share the figure with the SFB1315 group, as we are only including figures shared with that group on the SFB website.
Click on the Share with Group button, in the new window select the SFB1315 members group, and click the Share button. If you do not see the group, please contact me (Julien Colomb) to get access.
Publish the figure
If you want the world to be able to see your Smartfigure on the SFB website, you can now make it public. It will be shared using a CC-BY license (like a preprint). If the figure was not published with a permissive CC-BY license, please make sure you have the right to publish it here: the copyright holders (either the publisher or all the authors) should agree with this publication.
Do not hesitate to contact me for further information or if something is not clear.