GIN-onboarding 1: using the browser
You will find here one figure as an overview of GIN-Tonic tool. Then you can follow the onboarding video, or follow a text version of the onboarding given below. Some extra comments can be found in the end of this post.
1. Ice breaking
Hi. I am Julien Colomb (julien.colomb [at] hu-berlin.de), from the INF project. As a job-unrelated success story: I passed my Aikido 3.Kyu exam this summer ;)
2. GIN onboarding
Overview of GIN-Tonic
Welcome to this onboarding document. GIN-Tonic is a tool that brings data science practices into research, in order to facilitate the production of reproducible analysis (also in a larger team working remotely), for instance:
- One place to save all data
- Templates for folder and documentation files
- Backup and Version control of data and code
- Communication and project management tools
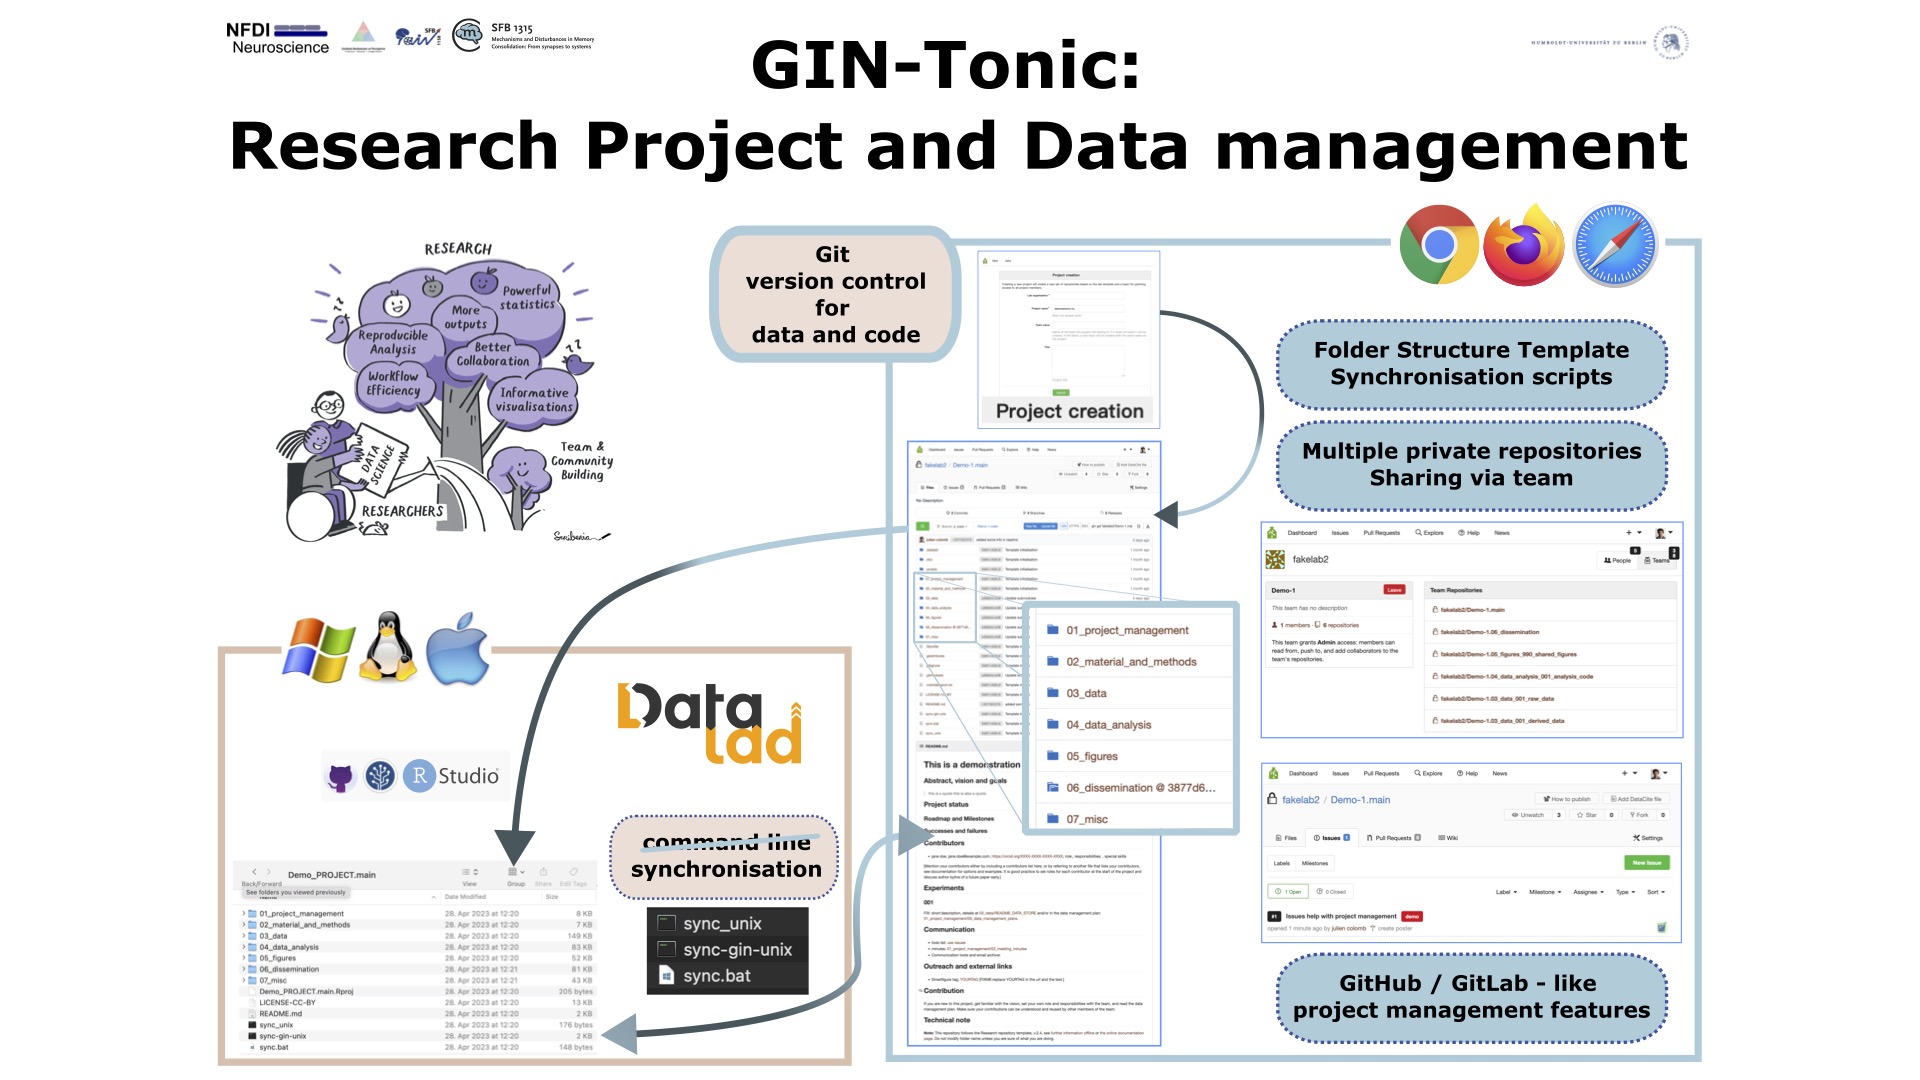 Overview of GIN-Tonic. On the right, the browser tools we will look at
in this video. On the left, the desktop synchronisation tool (demo
only). On the top, an image representing the advantages of using data
science tooling in research.
Overview of GIN-Tonic. On the right, the browser tools we will look at
in this video. On the left, the desktop synchronisation tool (demo
only). On the top, an image representing the advantages of using data
science tooling in research.
In the video below, I will show how to register and create a repository. We will look in more details the folder and readme template used. The tool creates 6 repositories inside one team, so one can share either one repository or all of them with co-workers. We have a demo of the use of issues as a project managment tool and way to ask for help.
Video
This 26 minutes video was made in portrait format, so you can keep it on one side of your screed and follow the instruction having your browser on the other half.
- 00:00. Getting a GIN account
- 02:03. Navigate organisation and teams
- 3:21. Create a tonic research repository
- 5:45. Navigate the folder structure
- 12:48. Downlaod one text file (markdown overview)
- 14:41. Upload one file
- 16:54. Modifying a file
- 17:40. History
- 16:48. Using issues
- 21:00. Demo of desktop use.
links
Here are the links to be used:
- Get a SFB-Gin account
- choose the “PRitter_lab / SFB1315_INF.06_dissemination“ repository (public repository)
- To get added to an organisation, send your username to me.
3. Text walkthrough
Get an account and login into https://gindata.biologie.hu-berlin.de.
To create a project, push the Access tonic functions button at bottom
of the page, click on the figure “Project creation”. In the tonic app,
sign in with the same credential, and fill the form with the
organisation and a project title (that title should not included spaces
or other special characters). Then push the submit button
Navigate into one folder, use the add file/upload file to create new files. To modify a text files, navigate to the file and an edit button will appear. Modify some text and push the commit button to save the changes.
For project management, you can use the issues function. Click the issue
button, then the green new issue button. Write a title and some
description and push the create issuebutton. You can add labels,
milestones and assignee before and after the creation of the issue.
5. Some comments
- One research project repository = multiple repositories.
- you can have many, many files without the repo to beome unusable.
- you can share different content with different people
- to share everything, open an issue (I will have to do that).
Onboarding II
Contact me to get datalad installed on your computer: https://cal.com/colomb/sfb1315-rdmwork?. A follow up video will show how different ways to clone (= install) the repository on your computer.